Azure Directory
This is an end-to-end tutorial to link the Azure AD Directory Service to Mamori.
Mamori provides Azure AD integration for both web logins via OAuth (MSAL) and database tools via the Micosoft device code workflow for browserless applications. Browserless applications are applications like database tools, BI servers, and other clients that do not have the facility to participate in SAML, Open ID or OAuth2 workflows. For browserless apps Microsoft provides the device code workflow.
You can read on how Microsoft's authetication workflows and device code workflow via the links below
- Azure AD Authentication Workflows
- Azure AD Browserless App Device Code Workform
- Azure AD - Configure a native client application
Yes, you will be Microsoft Entra Multi-Factored when you login to the Mamori web portal or via the transparent web proxy. However, Microsoft does not support further notifications post login. If you want to MFA users on every resource access, then you will need to enable Mamori Push TOTP and scan the QRCode with the Microsoft mobile app.
Setup Azure AD
First, login to Azure AD as the Azure Administrator and perform these tasks:
| Step | Description |
|---|---|
| Register a Mamori app in Azure | This includes setting up Microsoft Graph and Active Directory permissions |
| Create an Azure user group | Create a group and add users. |
Register a Mamori app in Azure
You first need to register Mamori as a Native Application within Azure.
Click Azure Active Directory then choose App Registrations.
Click New Application Registration.
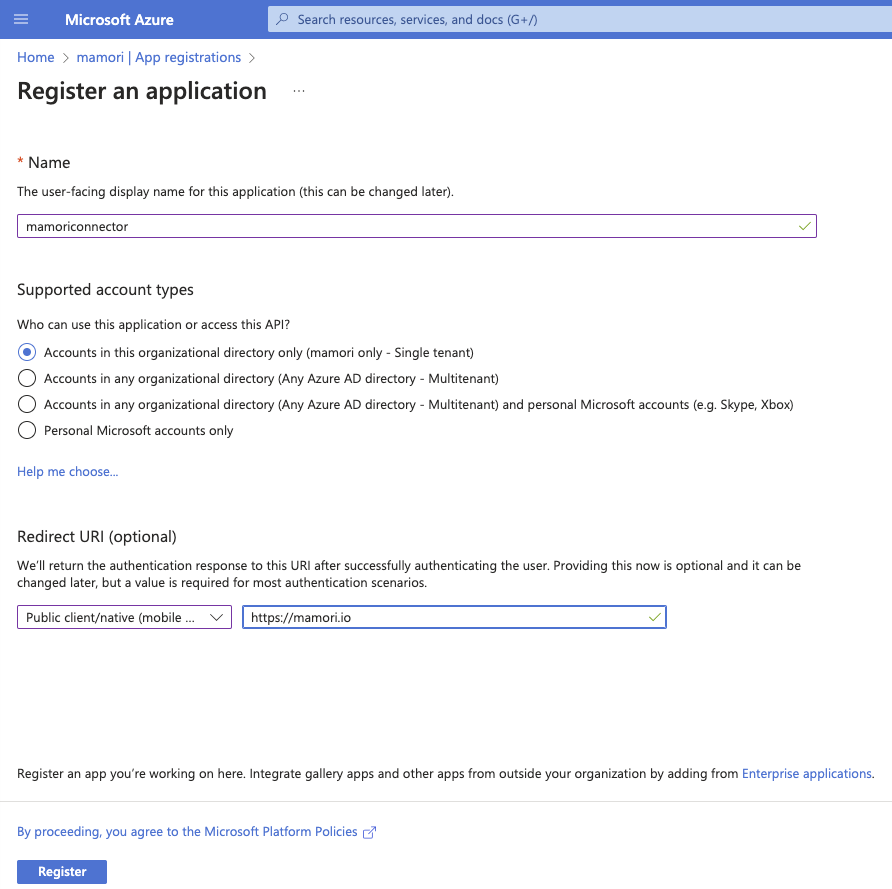
Field Value Name MamoriApp Type Native Redirect URI https://[mamori server]/auth/web/oauth/[Mamori Azure Provider Name]
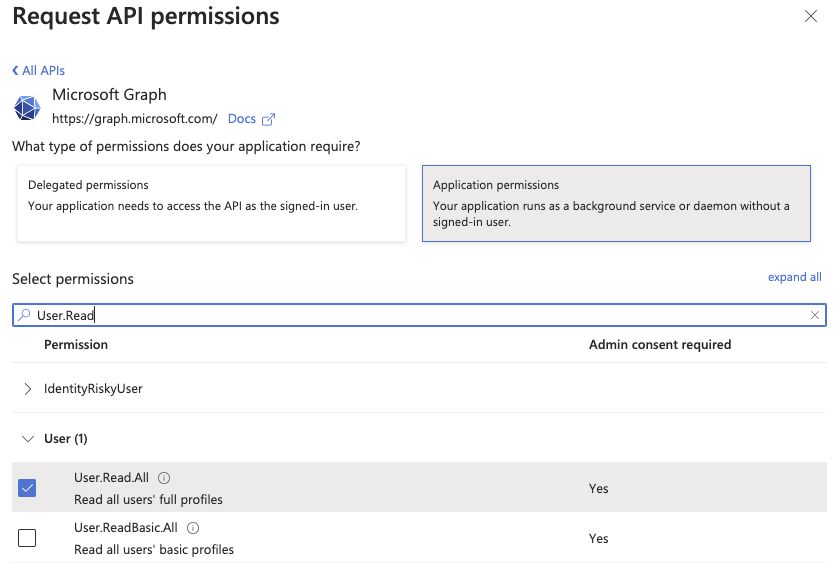
Set required permissions
Mamori Requires the following Application (Not Delegate) permissions. Follow the instructions below to add them.
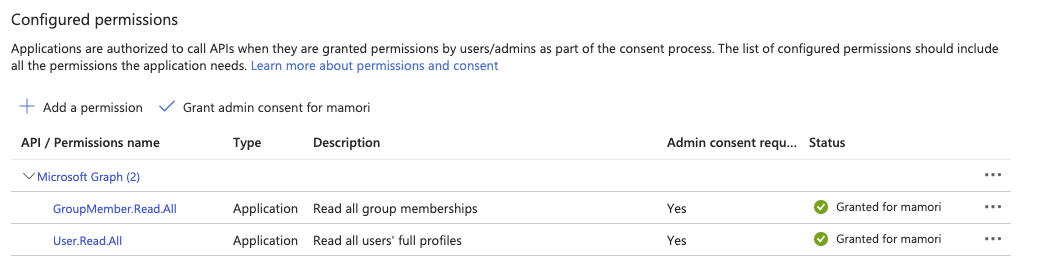
- GroupMember.Read.All
- User.Read.All
Open App registrations then choose your Mamori app MamoriApp.
Click API Permissions then Add a permission.
Click Microsoft Graph
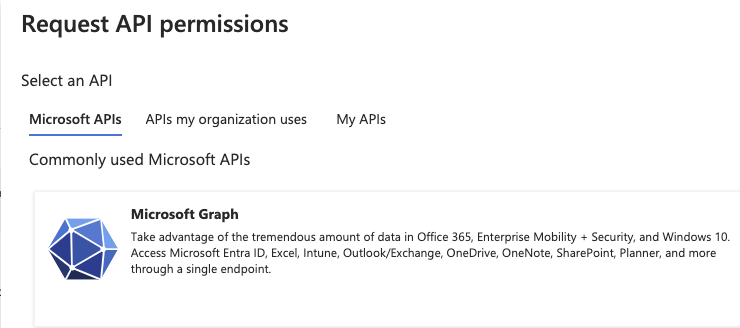
Select the following application permissions (Not Delegate):
- GroupMember.Read.All
- User.Read.All
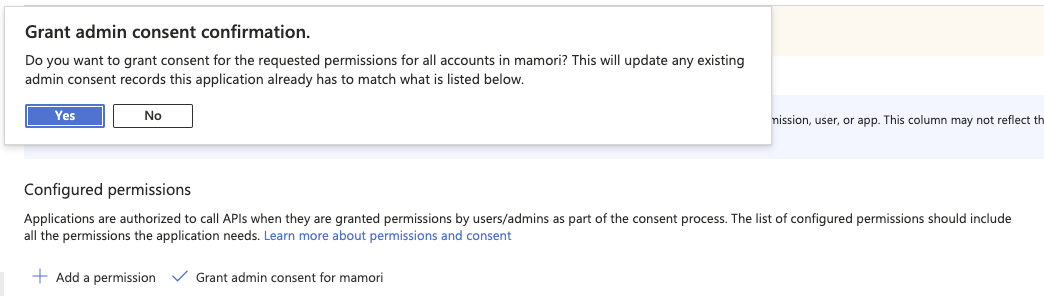
Click Grant admin consent for mamori
Permissions setup complete. The grid should look like the image below.

Create application secret token
Mamori uses an application secret to authenticate and request user group information.
Open App registrations then choose your Mamori app MamoriApp.
Click Certificates & secrets then New client secret.
Select secret expiration
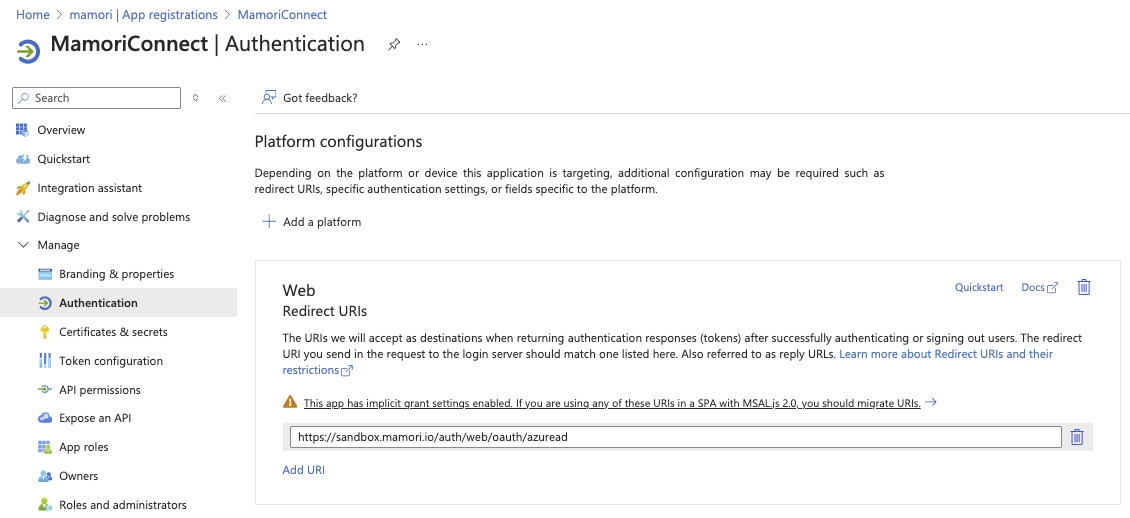
Set Authentication
To Configure Mamori-Azure OAuth logins:
Open App registrations then choose your Mamori app MamoriApp.
Click Authentications
Add a Web Redirect URI https://yourmamoriserver/auth/web/oauth/yourprovider
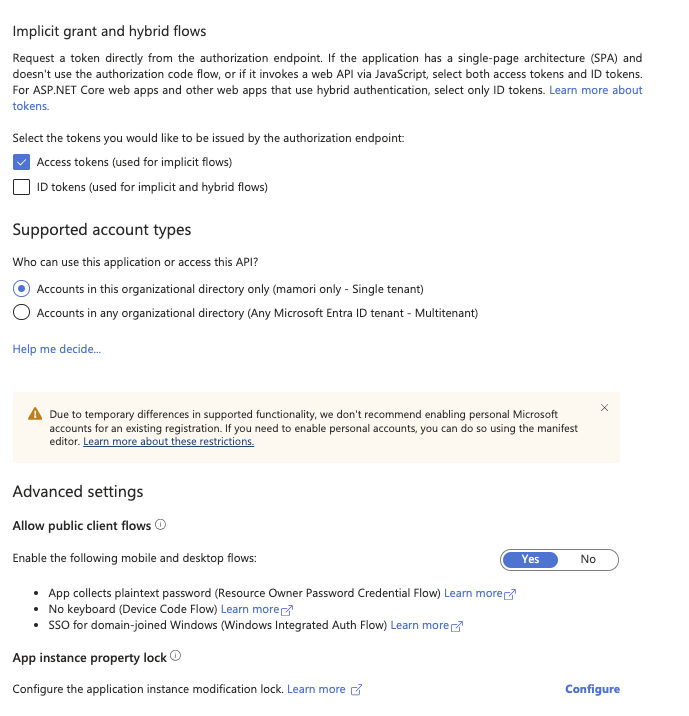
Check Access tokens (used for implicit flows) under Implicit grant and hybrid flows.
Toggle Yes Allow public client flows under Advanced settings
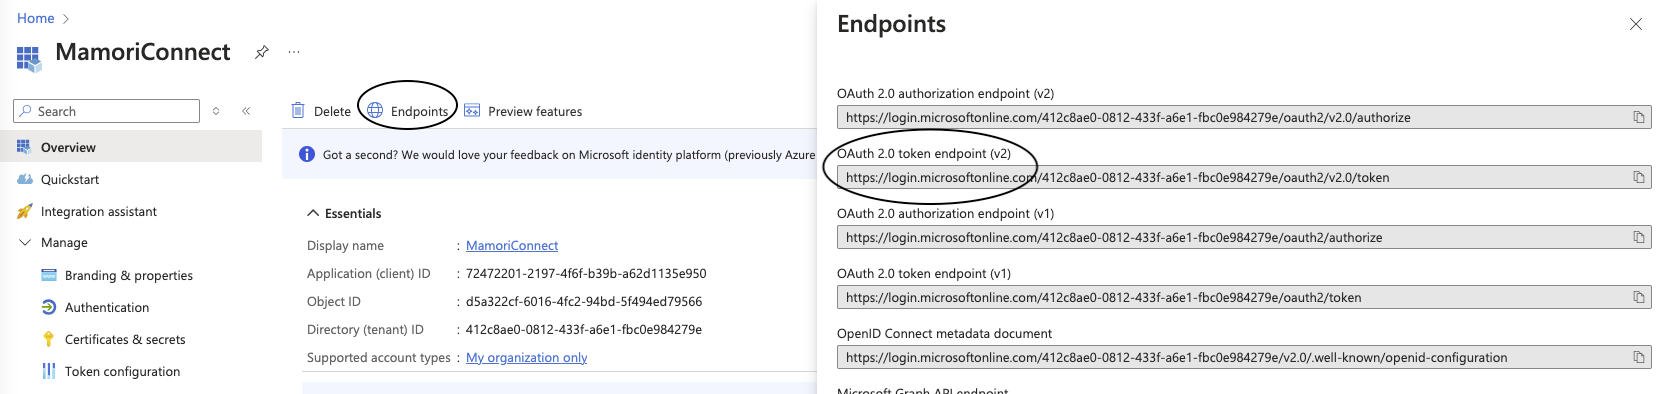
OAUTH 2.0 Authorization Endpoint
This step is only required for customers running multiple domains.
-
Open App Registrations then Endpoints.
-
Click the OAuth 2.0 token endpoint (v2) copy button and paste into a text file for later use.
Add Azure AD Authentication provider
Login to the mamori portal
Click Server Settings > Authentication ProvidersClick
Name the provider
Choose Azure Directory from the Authentication Provider list.
Fill in these fields on the Settings tab:
Field Description Required Azure path to find this... Application ID Redirect URI from App Registration settings Yes Azure Active Directory > App Registrations Authority Oauth Endpoint No Azure Active Directory > App Registrations > Endpoints > OAUTH 2.0 Token Endpoint Resource ID Microsoft Graph API resource name or ID No Azure Active Directory > App Registrations > Endpoints > Microsoft Azure AD Graph API Endpoint Secret Application API Secret Yes Redirect Service For MFA via Email, add an optional redirect service used to simplify the MFA email and remove the need to cut and paste the authorization code. The default is a free service at https://access.mamori.io/mfa/relay Click Create Provider when finished.
Add provider to authentication chain
Click update
Querying Azure Directory API
Click Console
to see all the available users in a directory
-- count users
call azure_search('{Your Azure AD Provider Name}', 'https://graph.microsoft.com/v1.0/users/$count');
-- fetch all users
call azure_search('{Your Azure AD Provider Name}', 'https://graph.microsoft.com/v1.0/users/');
-- fetch external users
call azure_search('{Your Azure AD Provider Name}', 'https://graph.microsoft.com/v1.0/users?$filter=userType%20eq%20''Guest''');